REVIEW · MEXICO CITY
Iztaccihuatl Guided Climb
Book on GetYourGuide →Operated by Travesías México · Bookable on GetYourGuide
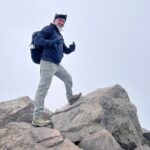
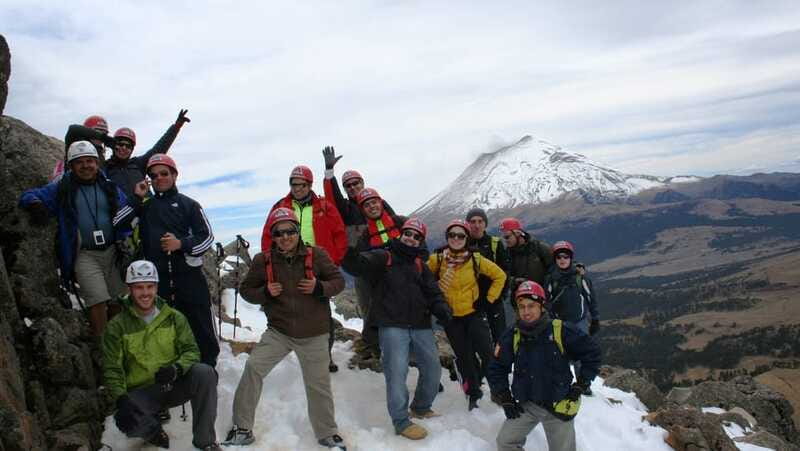
Iztaccihuatl is a volcano day you can actually plan for. This guided climb is built around panoramic stops over the range, including look-ins toward Popocatépetl and, later, views that reach toward Pico de Orizaba and the city of Puebla. You hike with a professional guide in a small group (up to 15), so the day stays focused on your pace, your safety, and the scenery.
The main thing to know is that this is not a casual stroll. The route has steep sections with real exposure, and the altitude can hit hard even if you feel fit; one group noted lightheadedness and vomiting for some hikers, especially on the way down.
In This Review
- Quick hits before you go
- Why Iztaccihuatl’s views feel like a reward, not a bonus
- Getting there from Mercado Michoacán: the day starts before the hike
- First pass to Popocatépetl: what the early climb teaches your body
- The scree slope and the third pass: the route gets steeper, the views get sharper
- Lunch inside the national park: regional food and a reality check
- The climb toward the 100 Hut at 4,720 meters: your turnaround point
- Gear and safety: what to bring for cold, sun, rain, and thin air
- Price and value: what you get for $214 per person
- Who should book this climb, and who should skip it
- Should you book the Iztaccihuatl Guided Climb?
- FAQ
- Where is the meeting point for the Iztaccihuatl Guided Climb?
- How long is the tour?
- What’s included in the price?
- What language is the guide?
- Is this a small group tour?
- What should I bring for the climb?
- Is lunch included?
- What is not included?
Quick hits before you go

- Panoramic passes on a third-highest Mexican volcano: You get multiple “change-of-view” moments as you cross the mountain’s sides.
- Popocatépetl and Pico de Orizaba viewpoints: Expect big-name volcano framing, not just generic mountain scenery.
- Professional guides who help you manage altitude: You’ll be encouraged to adjust pace and technique rather than rush.
- High destination at 4,720m (the 100 Hut): The day is structured to reach a real altitude milestone.
- Technical gear and a loaned backpack: You’re not showing up empty-handed.
- Plan for no restroom facilities in the park area: There’s a practical reminder here—bring toilet paper and use restroom stops before entering.
Why Iztaccihuatl’s views feel like a reward, not a bonus

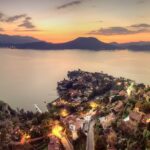
Iztaccihuatl sits in Puebla State and has earned its reputation for a reason: it’s a huge vantage point over a whole volcanic neighborhood. On a clear day, you’re not just looking at one peak. You’re looking across volcanoes, ridges, and valleys that make the region feel bigger than you expected, and that’s exactly what keeps the hike engaging from stop to stop.
What I like most is how the climbing route is designed around “portillo” moments—passes where the mountain literally puts a new side in front of you. That means you’re not stuck with one view for hours. You gain viewpoint changes as you go, including a first look toward Popocatépetl and later a second side where the Puebla area and Pico de Orizaba come into the frame.
This also matters because Iztaccihuatl is the third highest volcano in Mexico. You’re not getting a quick “stand and pose” day. You’re earning your angles, and the guide helps you stay comfortable enough to actually enjoy them.
You can also read our reviews of more guided tours in Mexico City
Getting there from Mercado Michoacán: the day starts before the hike
You’ll meet at the corner of Vicente Suarez and Michoacán, at the benches in front of the market in Mercado Michoacán. From there, you go by van and spend about two hours traveling, then you hike for hours, then you return by van for another roughly two hours.
That van time is part of the value. It lets you focus on the climb instead of figuring out transit between high-altitude trailheads and parking areas. It also sets expectations: this is a full day, not a short outing. If you hate feeling rushed, plan to eat lightly before you meet and bring water habits that work for you.
One more practical note: in the park portion of the experience, you shouldn’t count on restroom access during the hike itself. The most important move is simple—use the restroom when you have a chance before you’re fully in the park zone, and carry what you’ll need (including toilet paper) for any bathroom breaks along the way.
First pass to Popocatépetl: what the early climb teaches your body

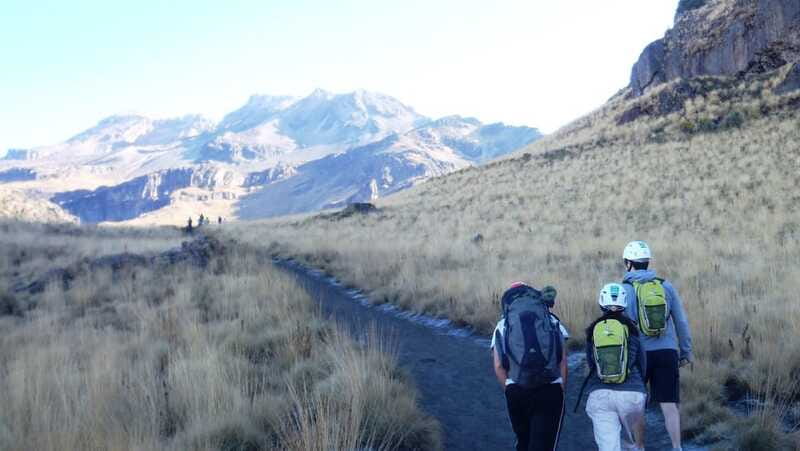
After you’re dropped off, the day starts with guided elements and a walk that gets you moving steadily. There’s typically a photo stop early, then you transition into the climbing rhythm with the guide. The route leads to a first pass where you can see the other side of the mountain, with a strong view toward Popocatépetl.
This early section is where altitude management becomes a skill, even if you’re used to hiking. Take the first portion slowly. Don’t chase other people’s pace; in thin air, “fast” turns into breathlessness quickly. The guide’s job isn’t just to point out landmarks. It’s also to help you move safely through steeper ground without wasting energy.
You’ll likely spend time on uneven terrain and sections that can feel exposed. That doesn’t mean you’re in danger the whole time. It means you should keep your steps deliberate and stay aware of footing. If you tend to overstride when you’re tired, this is a good time to shorten your steps and focus on stability.
The scree slope and the third pass: the route gets steeper, the views get sharper
As you continue, the path includes a scree slope—loose, gritty terrain that can make each step feel less solid. It’s the kind of surface that punishes rushing. You’ll get better traction by going slower, keeping your weight controlled, and letting the guide set the pace for the group.
Then you arrive at the third pass and cross back to the other side of the mountain again. This is one of the day’s big “wow” transitions. From this side, the scene opens toward Puebla and the impressive presence of Pico de Orizaba—the highest point in Mexico. The view isn’t just dramatic. It gives your brain a reason to keep going while your legs complain.
Here’s the consideration: steepness plus exposure plus thin air is a tough combo for anyone who expects a straightforward hike. One of the most honest pieces of advice you can follow is this: if you feel off, don’t hide it. Tell the guide. The guide can help you adjust pace, breathing, and how you handle the descent.
Lunch inside the national park: regional food and a reality check
Lunch comes after you’re in the Iztaccíhuatl–Popocatépetl National Park area. The tour includes regional food and sets aside about an hour, which is valuable because it’s time for real fuel, not just a snack break.
This lunch break is also a chance to reset mentally. The hike isn’t flat. It’s a day of effort, and taking the time to eat helps you avoid that post-lunch slowdown where people feel sluggish, then push too hard on the way up again.
The practical reality check is the restroom situation. Once you reach the park zone, there aren’t restroom facilities—even at the trailhead—so you should plan accordingly. Use the restroom before you enter, and bring your own toilet paper (and any pack-out trash supplies, if you plan to carry your own waste). Pack a small strategy for this now, not later.


The climb toward the 100 Hut at 4,720 meters: your turnaround point
The destination is the 100 Hut at 4,720 meters. That’s a high target and it shapes the whole day: you’re not just hiking for views. You’re hiking for a specific high-altitude milestone.
The final climb tends to be the part where altitude becomes obvious. Even if you don’t notice it at first, you’ll likely feel the effort increase as you gain elevation. You may also have to think about daylight. The hike can take long enough that turning around on time isn’t optional.
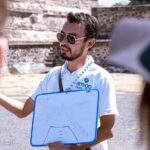
This is also where the guide’s support really matters. In past departures, guides like Sergio have been praised for being patient and courteous, especially with hikers who need a slower pace. Guides like Alberto have also been noted for strong local experience and careful, safety-first management.
Technical equipment is included, and that helps you move with more confidence on uneven ground. You also get a loan of a backpack, which means you’re not stuck improvising a carry method in the parking area.
Gear and safety: what to bring for cold, sun, rain, and thin air
You’re given technical equipment, but you still need to bring the basics that keep you comfortable and moving well. The recommended list includes comfortable shoes and hiking shoes, sunglasses, sunscreen, rain gear, gloves, and a change of clothes. A towel is also on the list—useful if you end up warm and then cool off quickly at elevation.
In altitude hikes, the “two weather problems” rule helps: sun can be strong, and conditions can turn chilly fast. Rain gear is smart even if the forecast looks friendly. Exposure means you’ll want sunglasses and a way to protect your skin from reflected light on rock and scree.
Hydration and pacing matter more than people expect. This is where you’ll feel the difference between “I can do it” and “I can do it safely.” I like that the group size is capped at 15—it’s easier for the guide to monitor pace and keep everyone together without turning the hike into a sprint.
Important fit note: the tour is not suitable for pregnant women, people with back problems, heart problems, or respiratory issues. If you fall into any of those categories, you’ll be better off choosing a different hike that’s designed with your needs in mind.
Price and value: what you get for $214 per person
At $214 per person for a one-day climb, the cost is mostly buying structure. You’re paying for transportation (van), professional guiding, mountain fees, technical equipment, insurance, lunch, and food—plus a loaned backpack.
That combination matters on a high-altitude route. Buying everything yourself usually ends up being more expensive once you factor in gear, permits/fees, and local expertise. Here, the guide handles route knowledge and pacing decisions, and you’re also covered by insurance included in the price. Lunch included is not a small perk either; it reduces the chance you end up hiking on empty.
Alcoholic drinks are not included, so if you want a celebratory drink afterward, budget for it separately. The main point is that your energy today should go toward the climb, not toward hunting for extra meals or renting gear.
Who should book this climb, and who should skip it
This is a great match if you want a serious day hike with real mountain effort and big-name volcanic scenery. You’ll enjoy it most if you’re comfortable walking on steep, exposed terrain and can handle altitude slowing you down. It’s also ideal if you like having a guide because it turns the day into something more than just “follow the trail.”
This may not be your best choice if you’re looking for an easy walk, if you need lots of restroom flexibility during the hike, or if you have health considerations in the not-suitable list (back, heart, respiratory, pregnancy). The altitude is part of the experience, not an optional add-on.
If you’re nervous about altitude, take comfort in the fact that guides in this region are typically used to managing slower pacing. Your job is to start conservatively and tell the guide early if you’re struggling.
Should you book the Iztaccihuatl Guided Climb?
Book it if you want a guided, high-altitude volcano day that gives meaningful viewpoint changes and a clear destination at 4,720 meters. You’re paying for a smooth logistics setup, professional guidance, included lunch, and the gear support that makes a steep climb more manageable.
Skip it if you’re not comfortable with altitude exposure or if you’re in any of the not-suitable categories listed for this tour. If you’re on the edge, be extra honest about your fitness and breathing tolerance before you commit.
If you do go, I’d plan your day around steadiness: slow start, sunscreen and sun protection, rain-ready layers, and restroom planning before you enter the park zone.
FAQ
Where is the meeting point for the Iztaccihuatl Guided Climb?
You meet at the corner of Vicente Suarez and Michoacán at the benches in front of the market.
How long is the tour?
The duration is 1 day.
What’s included in the price?
Transportation, a guide, mountain fees, technical equipment, lunch and food, insurance, and a loan of a backpack are included.
What language is the guide?
The live tour guide speaks English and Spanish.
Is this a small group tour?
Yes. The group is limited to 15 participants.
What should I bring for the climb?
Bring comfortable shoes (including hiking shoes), sunglasses, sunscreen, gloves, rain gear, gloves, change of clothes, a towel, and comfortable clothes.
Is lunch included?
Yes. Lunch with regional food is included.
What is not included?
Alcoholic drinks are not included. Also, you should plan for situations like restroom access based on the park conditions during the hike.